
jQueryプラグイン「Magnific Popup」でギャラリーを作成する方法
Contents
jQueryプラグイン「Magnific Popup」でギャラリーを作成する方法
サンプル
効果あり(ズームエフェクトあり)


HTMLコード
<!DOCTYPE html>
<html>
<head>
<meta charset="utf-8" />
<meta name="viewport" content="width=device-width, initial-scale=1, maximum-scale=1" />
<title>Magnific Popup Demo</title>
   <!-- Magnific Popup core CSS file -->
   <link rel="stylesheet" href="/assets/Magnific-Popup-master/dist/magnific-popup.css">
   <!-- jQuery 1.7.2+ or Zepto.js 1.0+ -->
   <script src="//ajax.googleapis.com/ajax/libs/jquery/1.9.1/jquery.min.js"></script>
   <!-- Magnific Popup core JS file -->
   <script src="/assets/Magnific-Popup-master/dist/jquery.magnific-popup.js"></script>
</head>
<body>
<div class="image-link" >
<h4>シンプル</h4>
<a href="https://www.single-life.tokyo/wp-content/uploads/2021/07/DSC06344.jpg" title="レッサーパンダ">
<img src="https://www.single-life.tokyo/wp-content/uploads/2021/07/DSC06344.jpg" style="width:15%;height:15%" />
</a>
<a href="https://www.single-life.tokyo/wp-content/uploads/2021/07/DSC07591.jpg" title="カピパラ">
<img src="https://www.single-life.tokyo/wp-content/uploads/2021/07/DSC07591.jpg" style="width:15%;height:15%" />
</a>
<a href="https://www.single-life.tokyo/wp-content/uploads/2021/07/DSC07708.jpg" title="ペンギン">
ペンギンを見る
</a>
</div>
<div class="image-gallery">
<h4>ギャラリー</h4>
<a href="https://www.single-life.tokyo/wp-content/uploads/2021/07/DSC06344.jpg" title="レッサーパンダ">
<img src="https://www.single-life.tokyo/wp-content/uploads/2021/07/DSC06344.jpg" style="width:15%;height:15%" />
</a>
<a href="https://www.single-life.tokyo/wp-content/uploads/2021/07/DSC07591.jpg" title="カピパラ">
<img src="https://www.single-life.tokyo/wp-content/uploads/2021/07/DSC07591.jpg" style="width:15%;height:15%" />
</a>
<a href="https://www.single-life.tokyo/wp-content/uploads/2021/07/DSC07708.jpg" title="ペンギン">
ペンギンを見る
</a>
</div>
<div class="image-effect">
<h4>効果あり(ズームエフェクトあり)</h4>
<a href="https://www.single-life.tokyo/wp-content/uploads/2021/07/DSC06344.jpg" title="レッサーパンダ">
<img src="https://www.single-life.tokyo/wp-content/uploads/2021/07/DSC06344.jpg" style="width:15%;height:15%" />
</a>
<a href="https://www.single-life.tokyo/wp-content/uploads/2021/07/DSC07591.jpg" title="カピパラ">
<img src="https://www.single-life.tokyo/wp-content/uploads/2021/07/DSC07591.jpg" style="width:15%;height:15%" />
</a>
<a href="https://www.single-life.tokyo/wp-content/uploads/2021/07/DSC07708.jpg" title="ペンギン">
<img src="https://www.single-life.tokyo/wp-content/uploads/2021/07/DSC07708.jpg" style="width:15%;height:15%" />
</a>
</div>
<script type="text/javascript">
$(document).ready(function() {
$('.image-link').magnificPopup({delegate: 'a',type:'image'});
$('.image-gallery').magnificPopup({delegate: 'a',type:'image',gallery: {enabled: true}});
$('.image-effect').magnificPopup(
{
delegate: 'a',
type: 'image',
gallery: {enabled: true},
mainClass: 'mfp-with-zoom', // this class is for CSS animation below
zoom: {
enabled: true, // By default it's false, so don't forget to enable it
duration: 300, // duration of the effect, in milliseconds
easing: 'ease-in-out', // CSS transition easing function
// The "opener" function should return the element from which popup will be zoomed in
// and to which popup will be scaled down
// By defailt it looks for an image tag:
opener: function(openerElement) {
// openerElement is the element on which popup was initialized, in this case its <a> tag
// you don't need to add "opener" option if this code matches your needs, it's defailt one.
return openerElement.is('img') ? openerElement : openerElement.find('img');
}
},
modal:false,
closeMarkup:'<button title="%title%" type="button" class="mfp-close">×</button>',
showCloseBtn:true
}
);
});
</script>
</body>
</html>デモ
インストール方法
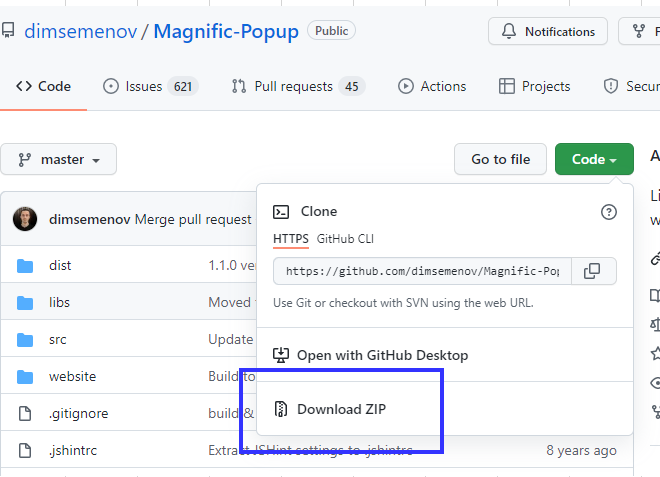
ライブラリの書庫ファイルはGitHubから入手してください。
GitHubのページで[Code]→[Download ZIP」を選択してください。
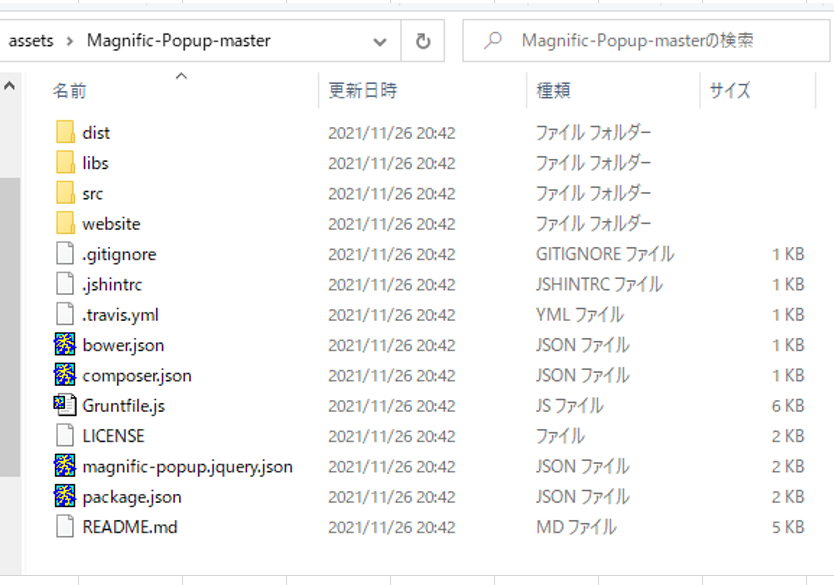
ダウンロード書庫ファイルを解凍すると以下のようなファイルが展開されます。
導入方法
CSSファイルインクルード
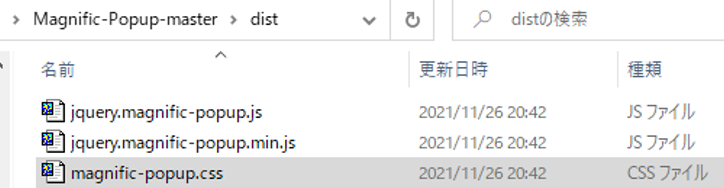
展開した書庫ファイルの直下にある「dis」の下にはCSSファイルとJSファイルがありますのっで、それをインクルードしてください。
<!-- Magnific Popup core CSS file -->
<link rel="stylesheet" href="/assets/Magnific-Popup-master/dist/magnific-popup.css">
まずは「magnific-popup.css」を読み込んでください。
JSファイルインクルード
次にjQueryのライブラリを読み込んだ後に、JSファイルを読み込みます。
読み込むファイルは「jquery.magnific-popup.js」または「jquery.magnific-popup.min.js」のどちらかとなります。

<!-- jQuery 1.7.2+ or Zepto.js 1.0+ -->
<script src="//ajax.googleapis.com/ajax/libs/jquery/1.9.1/jquery.min.js"></script>
<!-- Magnific Popup core JS file -->
<script src="/assets/Magnific-Popup-master/dist/jquery.magnific-popup.js"></script>
Magnific Popup初期化
最後にMagnific Popupを初期化すれば、導入完了です。
   <script type="text/javascript">
      $(document).ready(function() {
         $('.image-link').magnificPopup({delegate: 'a',type:'image'});
      });
   </script>
</body>
</html>
簡単ですね。
オプション
Content Types
まず、「Magnific Popup」で指定できるタイプは以下のものがあります。今回のサンプルでは「image」のみ紹介しています。
- image
- iframe
- inline
- ajax
Options
| delegate | ギャラリー項目のセレクタを指定できます。 |
| modal | trueにするとモーダルウインドウになり、閉じることができなくなります。 |
Gallery
| enabled | trueにすると、複数の項目を一つに紐づけることができ、ギャラリーを実装できます。 |
| arrowMarkup | 矢印ボタンのマークアップを定義できます。 デフォルトは 「'<button title=”%title%” type=”button” class=”mfp-arrow mfp-arrow-%dir%”></button>’」 |
| tPrev | 前ボタンのtitle属性に設定する文字列を定義できます。 |
| tNext | 次ボタンのtitle属性に設定する文字列を定義できます。 |
| tCounter | カウンター(全n枚中のn枚目のようなラベル)のマークアップを定義できます。 デフォルトは、 ‘<span class=”mfp-counter”>%curr% of %total%</span>’ 『%curr%』は現在の表示してる項目番号 『%total%』は全項目数 |
Zoom effect
| enabled | trueに設定すると、項目(写真など)を表示する際、エフェクト(効果)を付けて、表示できます。 |
| duration | エフェクト(効果)の持続時間をミリ秒でしてします。 |
| easing | エフェクト(効果)の種類を指定します。 指定する文字列は『ease』『ease-in』『ease-in-out』『ease-out』になります。 |
今回は「image」を設定する例を紹介しました。「Magnific Popup」を利用すれば、簡単にギャラリーを設定することができます。

する方法-345x230.png)

-1-1-255x170.png)
-255x170.png)
-255x170.png)
-255x170.jpg)