PhotoSwipe v5でギャラリーを作る方法
Contents
- 1 PhotoSwipe v5でギャラリーを作る方法
- 2 ギャラリー設定(キャプションなし)
- 3 ギャラリー設定(キャプションあり)
- 4 ギャラリー設定(キャプションあり:プラグインで実装)
- 5 オプションの紹介
- 5.1 Options
- 5.1.1 bgOpacity
- 5.1.2 spacing
- 5.1.3 allowPanToNext
- 5.1.4 loop
- 5.1.5 wheelToZoom
- 5.1.6 pinchToClose
- 5.1.7 closeOnVerticalDrag
- 5.1.8 padding
- 5.1.9 paddingFn
- 5.1.10 hideAnimationDuration
- 5.1.11 showAnimationDuration
- 5.1.12 zoomAnimationDuration
- 5.1.13 easing
- 5.1.14 escKey
- 5.1.15 arrowKeys
- 5.1.16 returnFocus
- 5.1.17 clickToCloseNonZoomable
- 5.1.18 preloaderDelay
- 5.1.19 indexIndicatorSep
- 5.1.20 getViewportSizeFn
- 5.1.21 errorMsg
- 5.1.22 preload
- 5.1.23 mainClass
- 5.1.24 appendToEl
- 5.1.25 maxWidthToAnimate
- 5.2 Translating(翻訳)
- 5.1 Options
- 6 ご参考
PhotoSwipe v5でギャラリーを作る方法
以前、「PhotoSwipeでギャラリーを作る方法」でPhotoSwipeを紹介しましたが、その時よりバージョンがアップされて、現在はバージョン5になっています。作りなどが大幅に変わっているので改めて紹介したいと思います。
導入方法
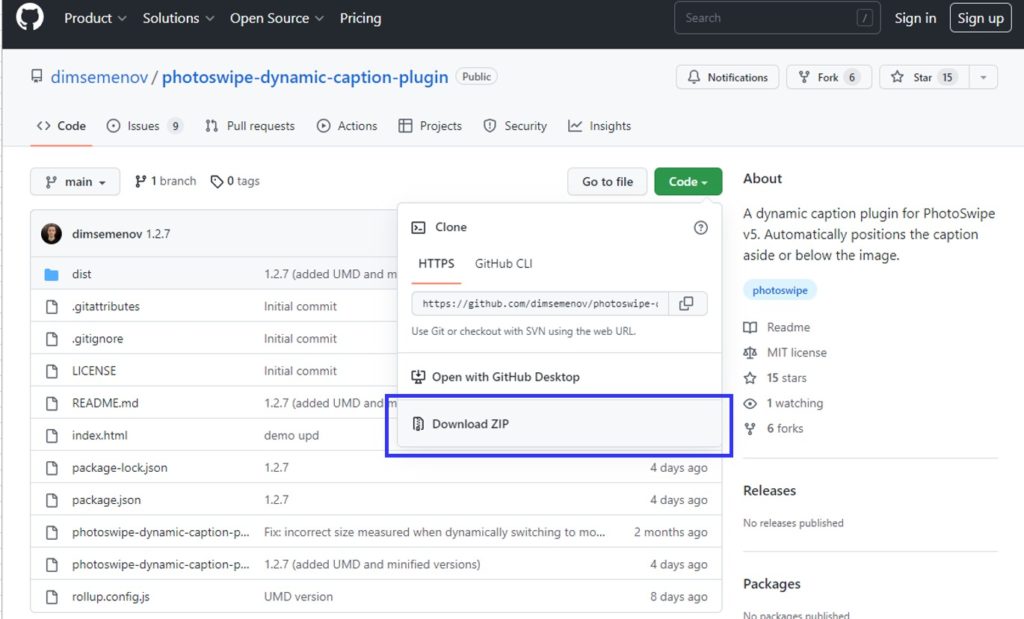
ダウンロード
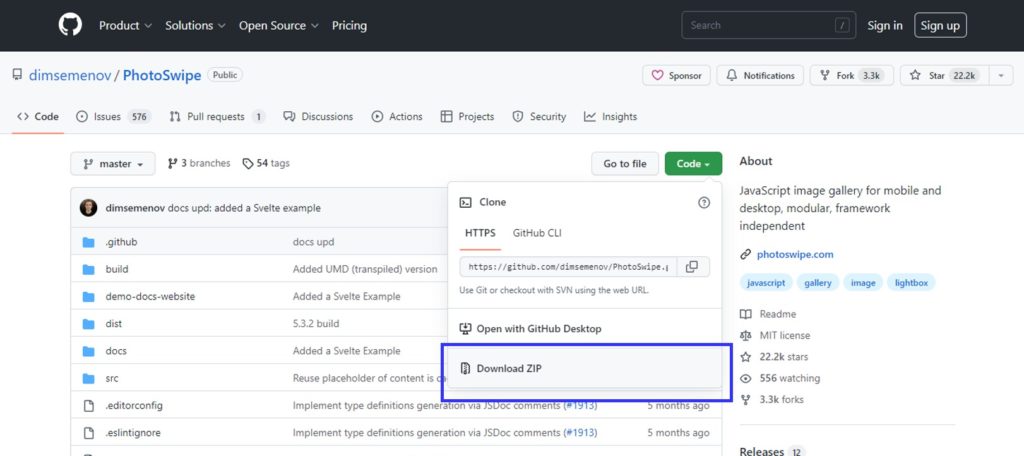
まず、GitHubからライブラリ一式をダウンロードしてください。
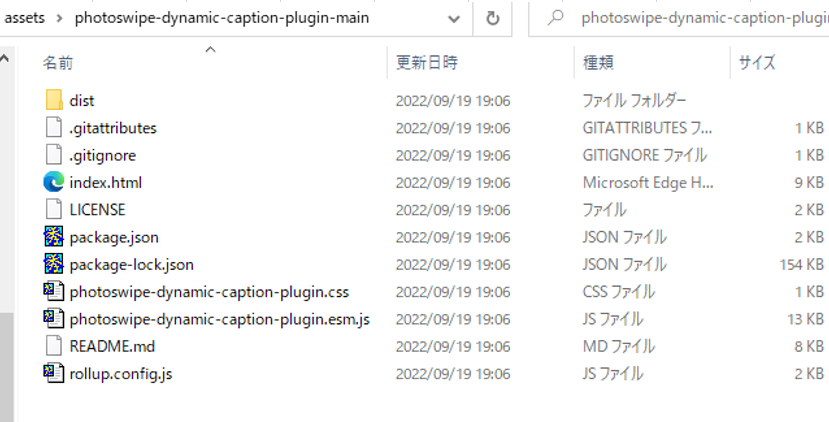
ダウンロードした書庫ファイルを展開すると以下のようなファイルが展開されます。
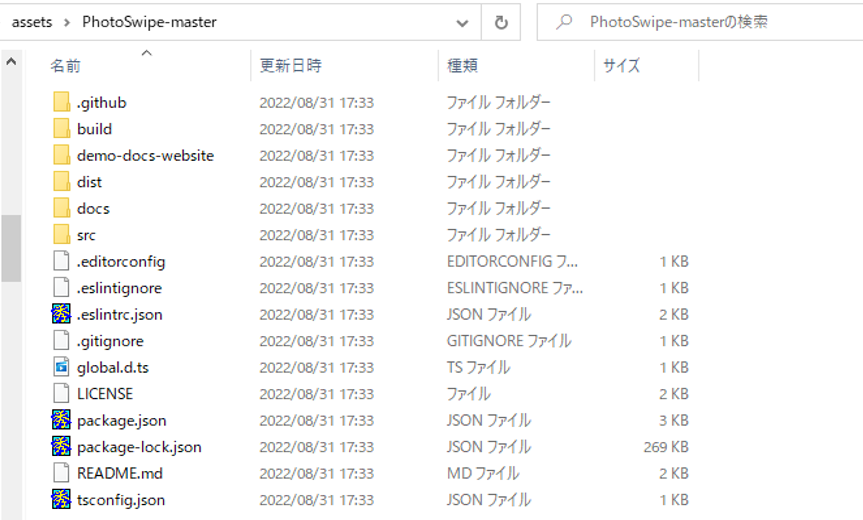
これを、今回のサンプルでは「(ウェブルート)/assets/」に展開しました。
実装方法
CSSファイルインクルード
まず、CSSファイルを読み込みます。

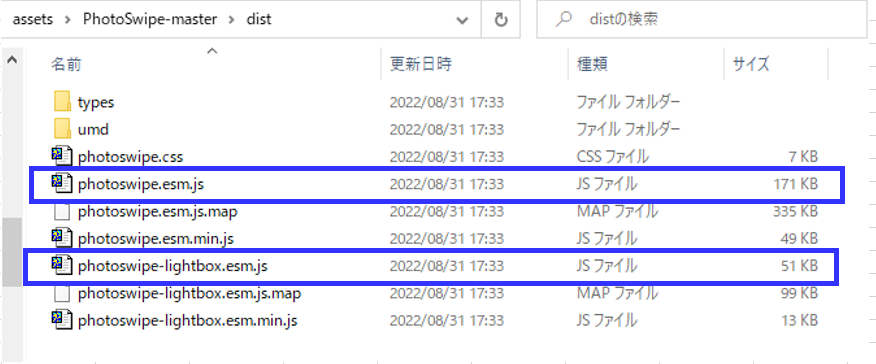
書庫ファイルを解凍して、解凍されたディレクトリの直下にある「dist」ディレクトリに『photoswipe.css』があるのでそれを読み込んでください。
<link rel="stylesheet" href="/assets/PhotoSwipe-master/dist/photoswipe.css">HTMLマークアップ
次に表示させたい写真の領域を定義していきます。
<div id="myGallery">
 ...
</div>
次に写真を設定していきます。
<div id="myGallery">
 <a href="(写真のURI)" data-pswp-height="(高さ)" data-pswp-width="(幅)"/>文字</a>
 <a data-pswp-src="(写真のURI)" data-pswp-height="(高さ)" data-pswp-width="(幅)"//>文字</a>
</div>
写真はアンカー(<a>タグ)で設定する場合には属性「href」に写真のURIを設定してください。アンカー以外の場合は属性「data-pswp-src」を設定し、写真のURIを設定してください。
また、表示時の「data-pswp-height」(高さ)、および、「data-pswp-width」(幅)の指定も必須となります。
サムネイルを設定したい場合には、アンカーの文字をイメージ(<img>)タグを設定してください。
<div id="myGallery">
 <a href="(写真のURI)" data-pswp-height="(高さ)" data-pswp-width="(幅)" /><img src="(写真のURI)" alt="サムネイル" /></a>
 <a data-pswp-src="(写真のURI)"  data-pswp-height="(高さ)" data-pswp-width="(幅)" /><img src="(写真のURI)"alt="サムネイル" /></a>
</div>
JSファイルインポート/初期化
最後にスクリプト(<script>)タグで、PhotoSwipeLightboxを初期化します。
<script type="module">
   // Include Lightbox
   import PhotoSwipeLightbox from '/assets/PhotoSwipe-master/dist/photoswipe-lightbox.esm.js';
   const lightbox = new PhotoSwipeLightbox({
     // may select multiple "galleries"
     gallery: '#myGallery',
     // Elements within gallery (slides)
     children: 'a',
     // setup PhotoSwipe Core dynamic import
     pswpModule: () => import('/assets/PhotoSwipe-master/dist/photoswipe.esm.js')
   });
   lightbox.init();
</script>
まず、「photoswipe-lightbox.esm.js」をインポートします。
これも、「photoswipe.css」と同じディレクトリ「dist」にありますので、そのパスを指定してください。
次に、PhotoSwipeLightbox初期化時に「photoswipe.esm.js」をインポートする必要があります。これも「dist」ディレクトリにありますので、同じくファイルパスを指定してください。
オプションの「gallery」には、ギャラリーを設定したいオブジェクトのセレクタを指定してください。
IDで指定する場合には先頭にシャープ(#)を、クラス名の場合にはピリオド(.)を付けて指定してください。
また、オプション「children」には、「gallery」で指定したセレクタの配下に存在し、ギャラリー対象のオブジェクトをセレクタで指定してください。
ギャラリー設定(キャプションなし)
まずは、キャプションなしのデフォルト設定でPhotoSwipeを実装するサンプルを紹介します。
サンプル

 文字あり
文字あり


HTMLコード
<!DOCTYPE html>
<html>
<head>
   <meta charset="utf-8" />
   <meta name="viewport" content="width=device-width" />
   <link rel="stylesheet" href="/assets/PhotoSwipe5/dist/photoswipe.css">
</head>
<body>
   <h4>デフォルト(キャプションなし)</h4>
   <div class="pswp-gallery pswp-gallery--single-column" id="gallery--getting-started">
     <a href="https://cdn.photoswipe.com/photoswipe-demo-images/photos/2/img-2500.jpg"
       data-pswp-width="1669"
       data-pswp-height="2500"
       target="_blank">
       <img src="https://cdn.photoswipe.com/photoswipe-demo-images/photos/2/img-200.jpg" alt="" />
     </a>
     <!-- cropped thumbnail: -->
     <a href="https://cdn.photoswipe.com/photoswipe-demo-images/photos/7/img-2500.jpg"
       data-pswp-width="1875"
       data-pswp-height="2500"
       data-cropped="true"
       target="_blank">
       <img src="https://cdn.photoswipe.com/photoswipe-demo-images/photos/7/img-200.jpg" alt="" />
       文字あり
     </a>
     <!-- data-pswp-src with custom URL in href -->
     <a href="https://unsplash.com"
       data-pswp-src="https://cdn.photoswipe.com/photoswipe-demo-images/photos/3/img-2500.jpg"
       data-pswp-width="2500"
       data-pswp-height="1666"
       target="_blank">
       <img src="https://cdn.photoswipe.com/photoswipe-demo-images/photos/3/img-200.jpg" alt="" />
     </a>
     <!-- Without thumbnail: -->
     <a href="http://example.com"
       data-pswp-src="https://cdn.photoswipe.com/photoswipe-demo-images/photos/5/img-2500.jpg"
       data-pswp-width="2500"
       data-pswp-height="1668"
       target="_blank">
       サムネイルなし
     </a>
     <!-- wrapped with any element: -->
     <div>
       <a href="https://cdn.photoswipe.com/photoswipe-demo-images/photos/6/img-2500.jpg"
         data-pswp-width="2500"
         data-pswp-height="1667"
         target="_blank">
         <img src="https://cdn.photoswipe.com/photoswipe-demo-images/photos/6/img-200.jpg" alt="" />
       </a>
     </div>
   </div>

   <script type="module">
      // Include Lightbox
      import PhotoSwipeLightbox from '/assets/PhotoSwipe5/dist/photoswipe-lightbox.esm.js';
      const lightbox = new PhotoSwipeLightbox({
        // may select multiple "galleries"
        gallery: '#gallery--getting-started',
        // Elements within gallery (slides)
        children: 'a',
        // setup PhotoSwipe Core dynamic import
        pswpModule: () => import('/assets/PhotoSwipe5/dist/photoswipe.esm.js')
      });
      lightbox.init();
   </script>
</body>
</html>
デモ
ギャラリー設定(キャプションあり)
Photoswipe v5では、デフォルトではキャプション機能をサポートしていませんし、また、写真の外にキャプションすることもできません。
ただ、APIを使えば、写真内にキャプションを設定することができます。
サンプル
HTMLコード
<!DOCTYPE html>
<html>
<head>
   <meta charset="utf-8" />
   <meta name="viewport" content="width=device-width" />
   <link rel="stylesheet" href="/assets/PhotoSwipe5/dist/photoswipe.css">
   <style type="text/css">
   .pswp__custom-caption {
     background: rgba(0, 0, 0, 0.75); /* キャプションの背景色 */
     font-size: 16px;
     color: #fff;                     /* キャプションの文字色 */
     width: calc(100% - 32px);
     max-width: 400px;
     padding: 8px 16px;
     border-radius: 4px;
     position: absolute;
     left: 50%;
     bottom: 16px;
     transform: translateX(-50%);
   }
   .pswp__custom-caption a {
     color: #fff;
     text-decoration: underline;
   }
   .hidden-caption-content {
     display: none;
   }
   </style>
</head>
<body>
   <h4>キャプションあり</h4>
   <div class="pswp-gallery pswp-gallery--single-column" id="gallery--getting-started">
     <a href="https://cdn.photoswipe.com/photoswipe-demo-images/photos/2/img-2500.jpg"
       data-pswp-width="1669"
       data-pswp-height="2500"
       target="_blank">
       <img src="https://cdn.photoswipe.com/photoswipe-demo-images/photos/2/img-200.jpg" alt="" />
       <span class="hidden-caption-content">キャプション1</span>
     </a>
     <!-- cropped thumbnail: -->
     <a href="https://cdn.photoswipe.com/photoswipe-demo-images/photos/7/img-2500.jpg"
       data-pswp-width="1875"
       data-pswp-height="2500"
       data-cropped="true"
       target="_blank">
       <img src="https://cdn.photoswipe.com/photoswipe-demo-images/photos/7/img-200.jpg" alt="" />
       文字あり
       <span class="hidden-caption-content">キャプション2</span>
     </a>
     <!-- data-pswp-src with custom URL in href -->
     <a href="https://unsplash.com"
       data-pswp-src="https://cdn.photoswipe.com/photoswipe-demo-images/photos/3/img-2500.jpg"
       data-pswp-width="2500"
       data-pswp-height="1666"
       target="_blank">
       <img src="https://cdn.photoswipe.com/photoswipe-demo-images/photos/3/img-200.jpg" alt="キャプション3" />
     </a>
     <!-- Without thumbnail: -->
     <a href="http://example.com"
       data-pswp-src="https://cdn.photoswipe.com/photoswipe-demo-images/photos/5/img-2500.jpg"
       data-pswp-width="2500"
       data-pswp-height="1668"
       target="_blank">
       サムネールなし <span class="hidden-caption-content">キャプション4</span>
     </a>

     <!-- wrapped with any element: -->
     <div>
       <a href="https://cdn.photoswipe.com/photoswipe-demo-images/photos/6/img-2500.jpg"
         data-pswp-width="2500"
         data-pswp-height="1667"
         target="_blank">
         <img src="https://cdn.photoswipe.com/photoswipe-demo-images/photos/6/img-200.jpg" alt="" />
         <span class="hidden-caption-content">キャプション5</span>
       </a>
     </div>
   </div>
   <script type="module">
      import PhotoSwipeLightbox from '/assets/PhotoSwipe5/dist/photoswipe-lightbox.esm.js';
      const options = {
        gallery:'#gallery--getting-started',
        children:'a',
        pswpModule: () => import('/assets/PhotoSwipe5/dist/photoswipe.esm.js')
      };
      const lightbox = new PhotoSwipeLightbox(options);
      lightbox.on('uiRegister', function() {
        lightbox.pswp.ui.registerElement({
          name: 'custom-caption',
          order: 9,
          isButton: false,
          appendTo: 'root',
          html: 'Caption text',
          onInit: (el, pswp) => {
            lightbox.pswp.on('change', () => {
              const currSlideElement = lightbox.pswp.currSlide.data.element;
              let captionHTML = '';
              if (currSlideElement) {
                const hiddenCaption = currSlideElement.querySelector('.hidden-caption-content');
                if (hiddenCaption) {
                  // get caption from element with class hidden-caption-content
                  captionHTML = hiddenCaption.innerHTML;
                } else {
                  // get caption from alt attribute
                  captionHTML = currSlideElement.querySelector('img').getAttribute('alt');
                }
              }
              el.innerHTML = captionHTML || '';
            });
          }
        });
      });
      lightbox.init();
   </script>
</body>
</html>
デモ
キャプションの設定方法
このソースでのキャプション設定方法を解説します。
HTMLマークアップ
<a href="(写真のURL)" data-pswp-height="(高さ)" data-pswp-width="(幅)"/>
  <img src="(写真のURL)"" /><!-- サムネイル -->
   <span class="hidden-caption-content">キャプション</span>
</a>
写真のアンカータグの中にクラス『hidden-caption-content』のオブジェクトを設定するだけで、キャプションとして設定されます。または、
<a href="(写真のURL)" data-pswp-height="(高さ)" data-pswp-width="(幅)"/>
  <img src="(写真のURL)"" alt="キャプション" /><!-- サムネイル -->
</a>
サムネイルのイメージ(<img>)タグの属性「alt」にキャプションを設定すると、キャプションが設定されて表示されます。
キャプションのスタイル設定
クラス「pswp__custom-caption」の定義を修正すれば、キャプションのスタイルも変更できます。
<style type="text/css">
.pswp__custom-caption {
  background: rgba(0, 0, 0, 0.75); /* キャプションの背景色 */
  font-size: 16px;
  color: #fff;                     /* キャプションの文字色 */
  width: calc(100% - 32px);
  max-width: 400px;
  padding: 8px 16px;
  border-radius: 4px;
  position: absolute;
  left: 50%;
  bottom: 16px;
  transform: translateX(-50%);
}
.pswp__custom-caption a {
  color: #fff;
  text-decoration: underline;
}
</style>
ギャラリー設定(キャプションあり:プラグインで実装)
プラグインで実装することでも、キャプションを設定できます。
キャプションを利用した場合には、写真表示エリア外にキャプションが設定されます。
サンプル
HTMLコード
<!DOCTYPE html>
<html>
<head>
   <meta charset="utf-8" />
   <meta name="viewport" content="width=device-width" />
   <link rel="stylesheet" href="/assets/PhotoSwipe5/dist/photoswipe.css">
   <link rel="stylesheet" href="https://unpkg.com/photoswipe-dynamic-caption-plugin/photoswipe-dynamic-caption-plugin.css">
</head>
<body>
   <h4>キャプションあり(プラグイン)</h4>
   <div class="pswp-gallery pswp-gallery--single-column" id="gallery--getting-started">
     <a href="https://cdn.photoswipe.com/photoswipe-demo-images/photos/2/img-2500.jpg"
       data-pswp-width="1669"
       data-pswp-height="2500"
       target="_blank">
       <img src="https://cdn.photoswipe.com/photoswipe-demo-images/photos/2/img-200.jpg" alt="" />
       <div class="pswp-caption-content"><b>キャプション1</b><br>内容をここに記述します</div>
     </a>
     <!-- cropped thumbnail: -->
     <a href="https://cdn.photoswipe.com/photoswipe-demo-images/photos/7/img-2500.jpg"
       data-pswp-width="1875"
       data-pswp-height="2500"
       data-cropped="true"
       target="_blank">
       <img src="https://cdn.photoswipe.com/photoswipe-demo-images/photos/7/img-200.jpg" alt="" />
       文字あり
       <div class="pswp-caption-content"><b>キャプション2</b><br>内容をここに記述します</div>
     </a>
     <!-- data-pswp-src with custom URL in href -->
     <a href="https://unsplash.com"
       data-pswp-src="https://cdn.photoswipe.com/photoswipe-demo-images/photos/3/img-2500.jpg"
       data-pswp-width="2500"
       data-pswp-height="1666"
       target="_blank">
       <img src="https://cdn.photoswipe.com/photoswipe-demo-images/photos/3/img-200.jpg" alt="キャプション3" />
     </a>
     <!-- Without thumbnail: -->
     <a href="http://example.com"
       data-pswp-src="https://cdn.photoswipe.com/photoswipe-demo-images/photos/5/img-2500.jpg"
       data-pswp-width="2500"
       data-pswp-height="1668"
       target="_blank">
       サムネールなし<div class="pswp-caption-content"><b>キャプション4</b><br>内容をここに記述します</div>
     </a>
     <!-- wrapped with any element: -->
     <div>
       <a href="https://cdn.photoswipe.com/photoswipe-demo-images/photos/6/img-2500.jpg"
         data-pswp-width="2500"
         data-pswp-height="1667"
         target="_blank">
         <img src="https://cdn.photoswipe.com/photoswipe-demo-images/photos/6/img-200.jpg" alt="" />
         <div class="pswp-caption-content"><b>キャプション5</b><br>内容をここに記述します</div>
       </a>
     </div>
   </div>
   <script type="module">
      import PhotoSwipeLightbox from '/assets/PhotoSwipe5/dist/photoswipe-lightbox.esm.js';
      // or 'photoswipe-dynamic-caption-plugin' if using package manager
      import PhotoSwipeDynamicCaption from 'https://unpkg.com/photoswipe-dynamic-caption-plugin/photoswipe-dynamic-caption-plugin.esm.js';

      const lightbox = new PhotoSwipeLightbox({
        gallerySelector: '#gallery--getting-started',
        childSelector: 'a',
        pswpModule: () => import('/assets/PhotoSwipe5/dist/photoswipe.esm.js'),
        // Optional padding for images,
        // note that this is an option of PhotoSwipe, not a plugin
        paddingFn: (viewportSize) => {
          return {
            top: 30, bottom: 30, left: 70, right: 70
          }
        },
      });
      const captionPlugin = new PhotoSwipeDynamicCaption(lightbox, {
        // Plugins options, for example:
        type: 'below',
      });
      // make sure you init photoswipe core after plugins are added
      lightbox.init();
   </script>
</body>
</html>
デモ
Dynamic caption plugin for PhotoSwipe v5の導入方法
ダウンロード
GitHubのページからライブラリ一式をダウンロードしてください。
書庫ファイルを解凍し展開すると以下のようなファイルやフォルダが展開されます。
導入方法
CSSファイルインクルード
まず、プラグインのCSSファイルを読み込んでください。
<link rel="stylesheet" href="/assets//photoswipe-dynamic-caption-plugin-main/photoswipe-dynamic-caption-plugin.css">まず「photoswipe-dynamic-caption-plugin.css」を読み込んでください。
ローカルのファイルを読み込むほかCDNのように公開されたCSSファイルもあります。
<link rel="stylesheet" href="https://unpkg.com/photoswipe-dynamic-caption-plugin/photoswipe-dynamic-caption-plugin.css">PhotoSwipeDynamicCaption初期化
<script type="module">
   import PhotoSwipeLightbox from '/assets/PhotoSwipe5/dist/photoswipe-lightbox.esm.js';
   // or 'photoswipe-dynamic-caption-plugin' if using package manager
   import PhotoSwipeDynamicCaption from '/assets/photoswipe-dynamic-caption-plugin-main/photoswipe-dynamic-caption-plugin.esm.js';

   const lightbox = new PhotoSwipeLightbox({
     gallerySelector: '#gallery--getting-started',
     childSelector: 'a',
     pswpModule: () => import('/assets/PhotoSwipe5/dist/photoswipe.esm.js'),
     // Optional padding for images,
     // note that this is an option of PhotoSwipe, not a plugin
     paddingFn: (viewportSize) => {
       return {
         top: 30, bottom: 30, left: 70, right: 70
       }
     },
   });
   const captionPlugin = new PhotoSwipeDynamicCaption(lightbox, {
     // Plugins options, for example:
     type: 'below',
   });
   // make sure you init photoswipe core after plugins are added
   lightbox.init();
</script>
まず、「photoswipe-dynamic-caption-plugin.esm.js」をインポートしてください。
「photoswipe-dynamic-caption-plugin.esm.js」についてもローカルのファイルを読み込むほかに公開されたファイルもあります。
<script type="module">
   ...
   import PhotoSwipeDynamicCaption from 'https://unpkg.com/photoswipe-dynamic-caption-plugin/photoswipe-dynamic-caption-plugin.esm.js';
   ...
</script>
そして「PhotoSwipeLightbox」を初期化した後に、その初期化オブジェクトを利用し「PhotoSwipeDynamicCaption」を初期化してください。
キャプションの設定方法
HTMLマークアップ
<a href="(写真のURL)" data-pswp-height="(高さ)" data-pswp-width="(幅)"/>
  <img src="(写真のURL)"" /><!-- サムネイル -->
   <div class="pswp-caption-content">キャプション</div>
</a>
写真のアンカータグの中にクラス『pswp-caption-content』のオブジェクトを設定するだけで、キャプションとして設定されます。または、
<a href="(写真のURL)" data-pswp-height="(高さ)" data-pswp-width="(幅)"/>
  <img src="(写真のURL)"" alt="キャプション" /><!-- サムネイル -->
</a>
サムネイルのイメージ(<img>)タグの属性「alt」にキャプションを設定すると、キャプションが設定されて表示されます。
キャプションの位置を変えるには?
PhotoSwipeDynamicCaptionのオプション「type」でキャプション位置を変えられます。
オプションの指定文字列は以下の3つです。
- below:常に写真の下にキャプション表示
- aside:常に写真の右にキャプション表示
- auto:自動的にキャプション表示位置を調整します。
オプションの紹介
Options
bgOpacity
背景の透明度を指定できるオプションです。デフォルトは「0.8」です。
spacing
スライド間の幅を指定できるオプションです。デフォルトは「0.1」です。0.1はビューポートの10%の幅になります。
allowPanToNext
スワイプで次のスライドに切り替えるようにするオプションです。デフォルトは「true」でスワイプでのスライド切り替えが可能です。
loop
「true」にすると最終スライドに行くと、最初のスライドに戻ることができます。デフォルトは「true」で最後のスライドの次に最初のスライドに戻ります。
wheelToZoom
「true」にすると、マウスのホイールを回すとズームインしたりズームアウトしたりできます。デフォルトでは「false」で、この機能は無効です。
pinchToClose
「true」にすると、ピンチインやピンチアウトすると、ギャラリーが閉じます。デフォルトは「true」です。
closeOnVerticalDrag
「true」にすると、垂直ドラッグ後、ギャラリーが閉じます。デフォルトは「true」です。
padding
パディングを指定できるオプションです。デフォルトは以下の通りです。
{ top: 0, bottom: 0, left: 0, right: 0 }.paddingFn
パディングを関数で指定できるオプションです。「padding」オプションの指定値を上書きます。
hideAnimationDuration
showAnimationDuration
zoomAnimationDuration
ギャラリー非表示/表示/ズーム時のアニメーション時間をミリ秒で指定できるオプションです。デフォルトは「333」(ミリ秒):0.333秒です。
easing
アニメーション効果を定義できるオプションです。デフォルトは以下の通りです。
'cubic-bezier(.4,0,.22,1)'アニメーション効果については以下のページを参照してください。
escKey
「true」にすると、[Esc]キーを押すとギャラリーが閉じます。デフォルトは「true」です。
arrowKeys
「true」にすると、右向き矢印(→)キーで次のスライドへ、左向き矢印(←)キーで前のスライドに戻ります。デフォルトは「true」です。
returnFocus
ギャラリーを閉じた時に、表示前アクティブだったエレメントにフォーカスが戻るかどうかのオプションです。デフォルトは「true」で元のエレメントにフォーカスが戻ります。
clickToCloseNonZoomable
画像がズームできるくらい大きくない時に、画像をクリックしたときにズームする代わりにギャラリーが閉じます。デフォルトは「true」で、画像サイズがズームできるくらいの大きさでない場合、ギャラリーが閉じます。
preloaderDelay
読み込みインジケータが表示されるまでの猶予時間をミリ秒で設定できるオプションです。
デフォルトは「2000」(ミリ秒):2秒です。
0に設定すれば、インジケータは全く表示されなくなります。
indexIndicatorSep
インデックスインジケータのセパレータ(区切り文字)を定義できるオプションです。デフォルトは「/」(スラッシュ)です。

getViewportSizeFn
スライドのX軸、Y軸を返すファンクションになります。
errorMsg
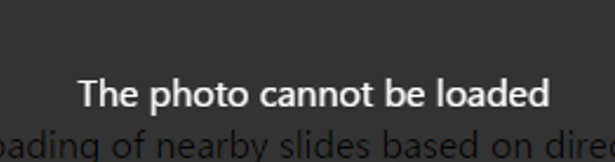
画像を読み込めなかった場合に表示させるエラーメッセージを定義できるオプションです。
デフォルトは「The image cannot be loaded」です。
preload
事前に読み込むスライドを定義できるオプションです。
mainClass
定義すれば、PhotoSwipeのルートエレメントに適用されるクラスとなります。
なお、スタイルについては以下のページを参照してください。
appendToEl
PhotoSwipeダイアログエレメントに追加されるエレメントを定義できます。
maxWidthToAnimate
アニメーションで表示できる最大画像幅を指定できるオプションです。デフォルトは「4000」(ピクセル)です。これを超える画像の場合は表示時、アニメーション効果なく画像が表示されます。
Translating(翻訳)
代替テキストが英語になっているので、オプションを使い日本語に翻訳することもできます。
<script type="module">
   // Include Lightbox
   import PhotoSwipeLightbox from '/assets/PhotoSwipe5/dist/photoswipe-lightbox.esm.js';
   const lightbox = new PhotoSwipeLightbox({
     // may select multiple "galleries"
     gallery: '#gallery--getting-started',
     // Elements within gallery (slides)
     children: 'a',
     // setup PhotoSwipe Core dynamic import
     pswpModule: () => import('/assets/PhotoSwipe5/dist/photoswipe.esm.js'),
     closeTitle: '閉じる',
     zoomTitle: 'ズーム',
     arrowPrevTitle: '前へ',
     arrowNextTitle: '次へ',
     pswpModule: () => import('/assets/PhotoSwipe5/dist/photoswipe.esm.js'),
   });
   lightbox.init();
</script>
closeTitle
閉じる「✖」ボタンの代替テキストに適用される文字列を指定できるオプションです。

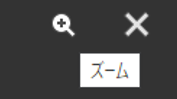
zoomTitle
虫眼鏡ボタンの代替テキストに適用される文字列を指定できるオプションです。
arrowPrevTitle
次のスライドに移動させる「>」ボタンの代替テキストに適用される文字列を指定できるオプションです。

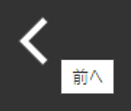
arrowNextTitle
前のスライドに移動させる「<」ボタンの代替テキストに適用される文字列を指定できるオプションです。
ご参考
関連ページ
- WordPress(ワードプレス)でPhotoSwipe v5を利用する方法
- PhotoSwipeでギャラリーを作る方法
- Lightcaseでギャラリーを作る方法
- Colorboxでギャラリーを作る方法
- LIGHTBOXでギャラリーを作る方法
- Fancybox v4でギャラリーを作る方法
- WordPress(ワードプレス)でFancybox v4を利用する方法
- 軽量lightboxライブラリ「Luminous」でギャラリーを作る方法
- WordPress(ワードプレス)で軽量Lightbox「Luminous」を利用する方法


で使えるラベルを自作する方法-345x230.png)
-1-1-255x170.png)
-255x170.png)
-255x170.png)
-255x170.jpg)